Ubuntu on BTRFS with Timeshift and disk encryption [VIDEO]
Btrfs and its snapshots feature is all the rage nowadays. Ubuntu though doesn’t support it in it’s guided partitioning. Although, we may still do it, but we need to do it ourselves. If we also want disk encryption on top of it, there’s an added complexity to it. I’ve made a video explaining how to do it, but here’s an article with some copy-paste’able commands.
So, during installation, proceed normally, until you reach this screen:

Then we select ‘Something else’ and proceed.
On the next screen, you either create new partition table, or use the free space if you already have one or you have e.g.: a Windows installation you wanna keep. But then I assume you already have some free space prepared to partition for your Ubuntu install.
So, first you need to create an EFI partition (if it doesn’t exist already). I’ve chosen to give it 512MB, and all you need is to select the type ‘EFI System Partition’.
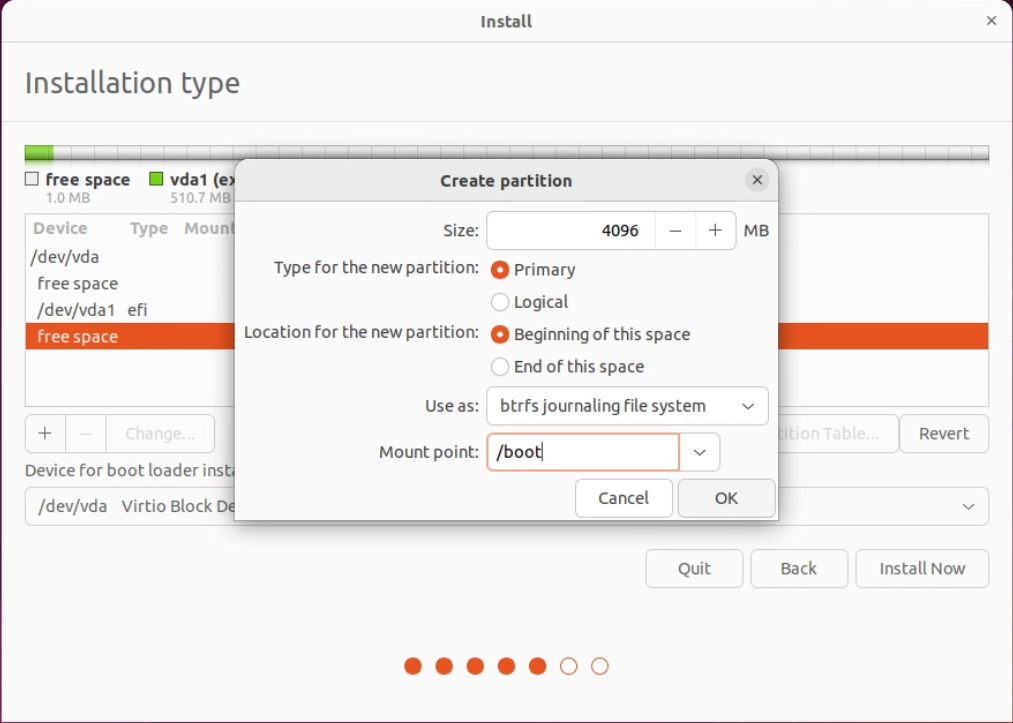
Next thing is boot partition. We need separate one for that, because Ubuntu does not support encrypting the whole disk. I would recommend creating a 4GB partition, filetype might be ext4 or btrfs, a set it to /boot.
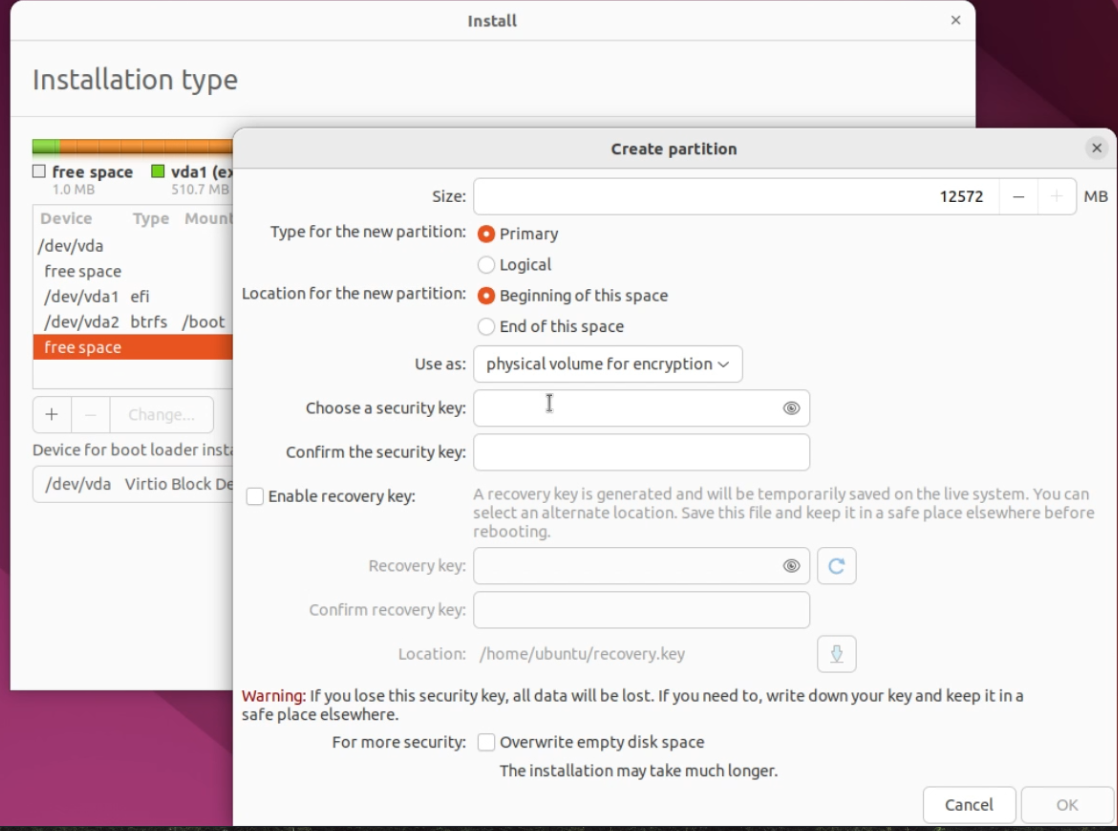
Next step will be creating your root partition. Here it is a little tricky, as you might think that here we need to select btrfs, and then maybe somewhere we could tick encryption on, but it doesn’t work that way.
Here I decided to use the rest of the free space, and that’s probably what you want too. Then select to use the partition as ‘physical volume for encryption’, type in your security key. You may choose to create recovery key at this point, but you would need to remember to copy it from the live system before rebooting.
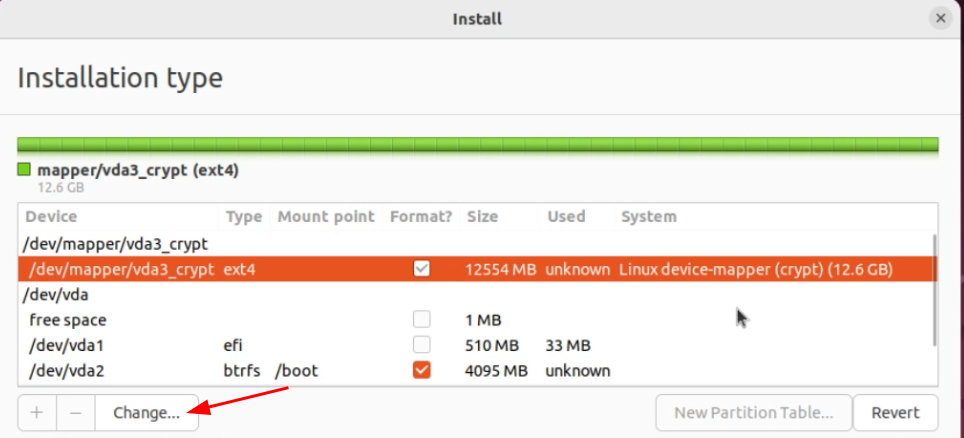
By default, Ubuntu then maps the new encrypted partition as an ext4 filesystem. We need to change it and also, set the correct mount point.
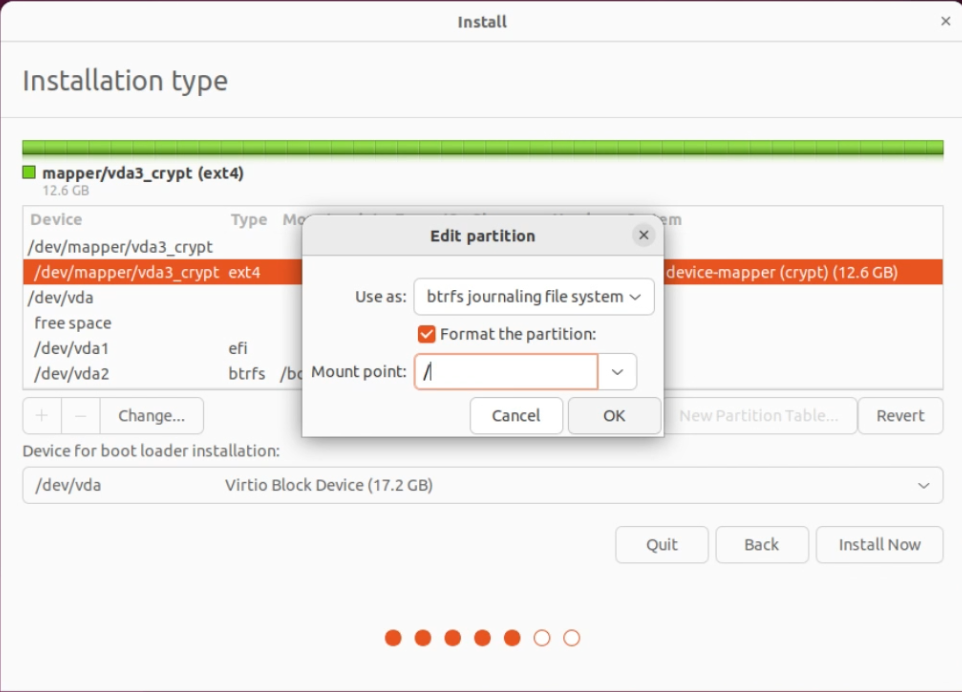
Now you can proceed with installation.
After it is completed, and rebooting to new system, there is a little bit of setup to do in order to make real use of btrfs.
Let’s install Timeshift. Open the Terminal app, and execute below commands:
sudo apt update
sudo apt install timeshift
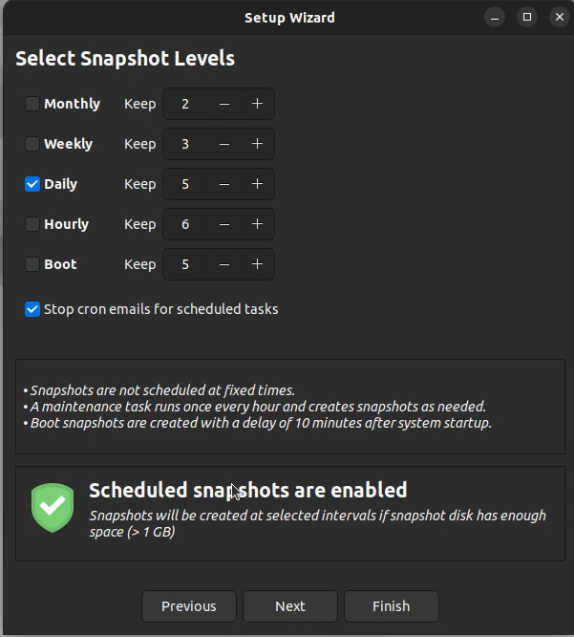
Now, open Timeshift and select btrfs, select your root partition and proceed with the defaults. You will have an option to select how often snapshots are made and how many of each type of snapshots should be kept.
So, your backups are now set up.
Another thing you might want to set up, is a swap file which we didn’t have an option to do during partitioning (or I’m missing something there). I try explain in the video, why we need so much hassle to make the swap file work, here I would just list the steps you need to do.
Create a swap subvolume in the root directory:
cd /
sudo btrfs subvolume create swap
Then, disable copy-on-write on the swap subvolume:
sudo chattr +C /swap
Now, create a swap file. The example creates 1GB swapfile, you might want to create something around half of your RAM.
sudo fallocate -l 1G /swap/file
sudo chmod 0600 /swap/file
sudo mkswap /swap/file
Next thing is setting our swap file as an actual swapspace. Edit /etc/fstab as root:
sudo nano /etc/fstab
And add folloring line to it:
/swap/file none swap defaults 0 0
Now execute below command to activate all configured swap:
sudo swapon -a
And it is done! Enjoy your new installation. :)